零成本!无需服务器也能搭建自己的博客网站,支持CI/CD!
前言
Hexo 是一个快速、简洁且高效的博客框架。Hexo 使用 Markdown(或其他标记语言)解析文章,在几秒内,即可利用靓丽的主题生成静态网页。
GitHub Action是GitHub中一种持续集成和持续交付 (CI/CD) 平台,可以通过创建工作流程来构建和测试存储库的每个拉取请求,或将合并的拉取请求部署到生产环境。简单说:就是分支有任何变动的时候可以实时部署。
GitHub Pages 是一项静态站点托管服务,它直接从 GitHub 上的仓库获取 HTML、CSS 和 JavaScript 文件,(可选)通过构建过程运行文件,然后发布网站。
Hexo搭建博客
账号准备:
- GitHub账号
环境准备:
- Git
- Nodejs
一、安装Hexo
新建 blog 文件夹,进入此目录下
1. 安装Hexo脚手架
1 | npm install -g hexo-cli |
2. 初始化Hexo
1 | hexo init |
3. 下载 NexT 主题
这一步可以省略,如果不安装主题,则使用hexo的默认主题。
1 | cd themes |
4. 启动本地服务查看
1 | hexo s |
服务启动后,可以通过localhost:4000查看效果。
二、Git仓库
1. 建立名为 <你的 GitHub 用户名>.github.io 的储存库。
若之前已将 Hexo 上传至其他储存库,将该储存库重命名即可,名字一定要是这个。
2. 配置GitHub Page
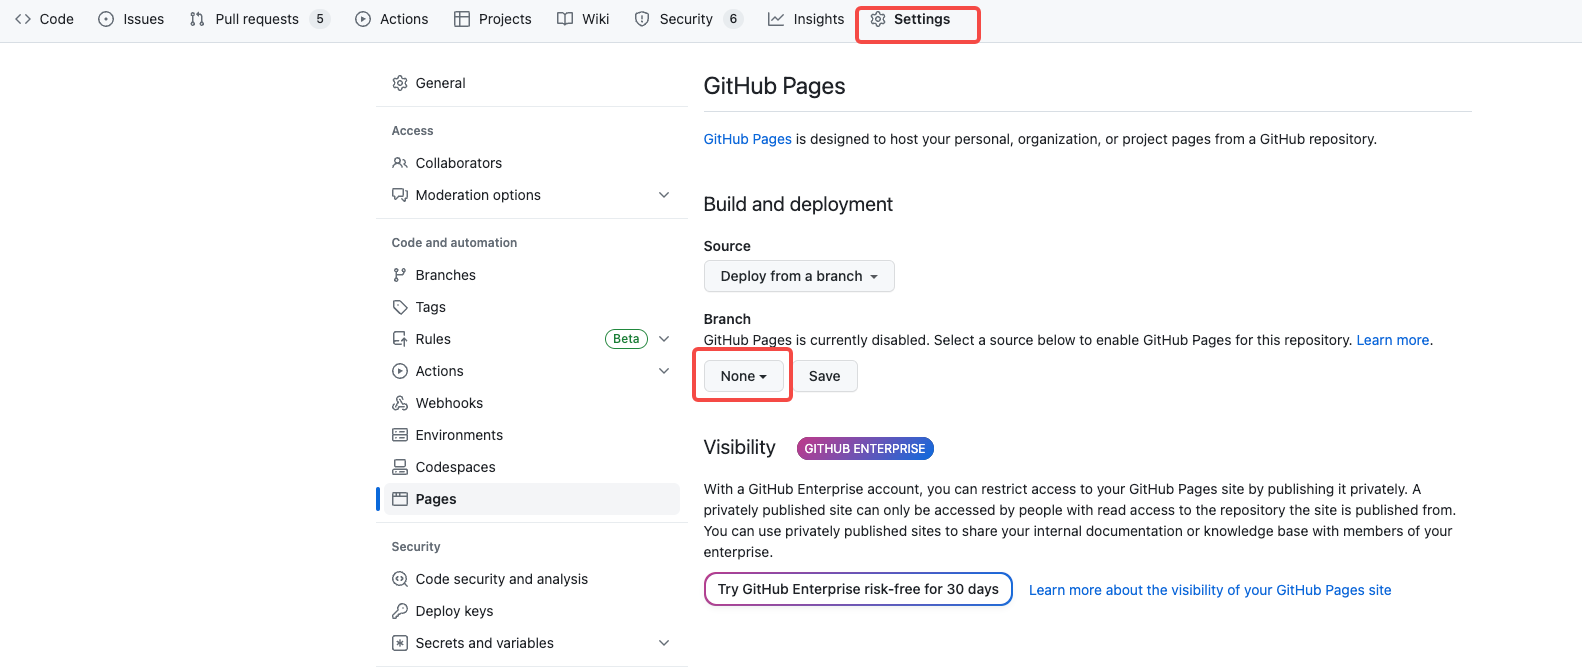
分支选择main分支即可。
3. 修改本地仓库配置
打开项目根目录下的 _config.yml 配置文件配置参数。拉到文件末尾,填上如下配置:
1 | deploy: |
4. 要安装一个部署插件 hexo-deployer-git。
将 Hexo 文件夹中的文件 push 到储存库的默认分支,默认分支通常名为 main,旧一点的储存库可能名为 master。
1 | git push -u origin main |
5. 执行上传命令
1 | hexo g -d |
默认情况下 public/ 不会被上传(也不该被上传),确保 .gitignore 文件中包含一行 public/。整体文件夹结构应该与 范例储存库 大致相似。
三、开始写作
博客搭好了,就开始写文章了,这里简单介绍一下,详细的文档可以看 hexo 官网。
1. 新建文章,输入以下命令即可
1 | hexo new '文章标题' |
执行完成后可以在 /source/_posts 下看到一个“文章标题.md”的文章文件啦。.md 就是 Markdown 格式的文件,具体用法可以在网上找一下,语法还是比较简单的。
2. 本地预览
1 | # 生成静态文件 |
3. 发布
1 | # 清除缓存 |
至此,就实现了个人博客的搭建。
GitHub Action实现CI/CD
基于上面的使用场景,主要有以下问题:
- hexo相关配置,博客源码保存在A电脑上,我想通过B电脑写新的博客文章时需要将源码复制一份到B电脑,且B电脑也要安装hexo。
- 每次写好文章,都需要手动通过
hexo d命令编译静态文件并推送代码,缺少一套CI/CD流程,在push代码到远程仓库后自动编译部署。
针对这两个问题,我们使用GitHub actions解决,GitHub Actions文档请点击这里。
GitHub Action的实现原理是:定义一个.yml的编排命令文件(类似于docker-compose的yml文件),在yml文件中可以监听指定分支,该分支有push操作的时候会通过虚拟机系统执行一系列的命令。
在使用的过程中大致总结了两套方案:
- 源码和静态代码放在同一个仓库中。
- 源码和静态代码放在不同仓库中。
接下来分别介绍两种使用方式。
一、源码和静态代码放在同一个仓库中
放在同一个仓库中,主要是用分支来管理:
- main分支:管理源码。
- gh-pages:管理静态文件。
当main分支有源码发布的时候,执行ci/cd编译静态代码上传到gh-pages分支。
1. 生成密钥
创建 SSH 部署密钥,使用以下命令生成部署密钥。
1 | ssh-keygen -t rsa -b 4096 -C "$(git config user.email)" -f gh-pages -N "" |
您将获得 2 个文件:
- gh-pages.pub是公钥
- gh-pages是私钥
2. 源码分支配置
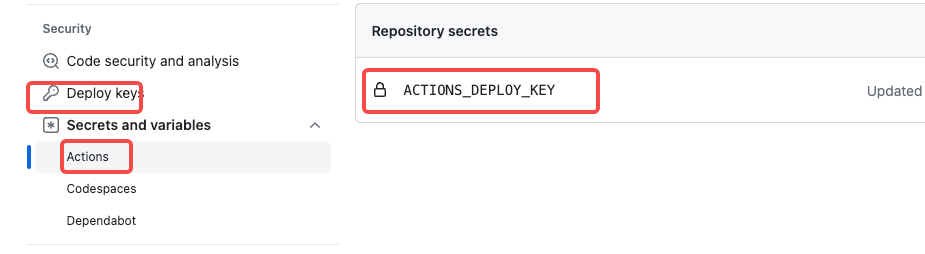
Deploy keys
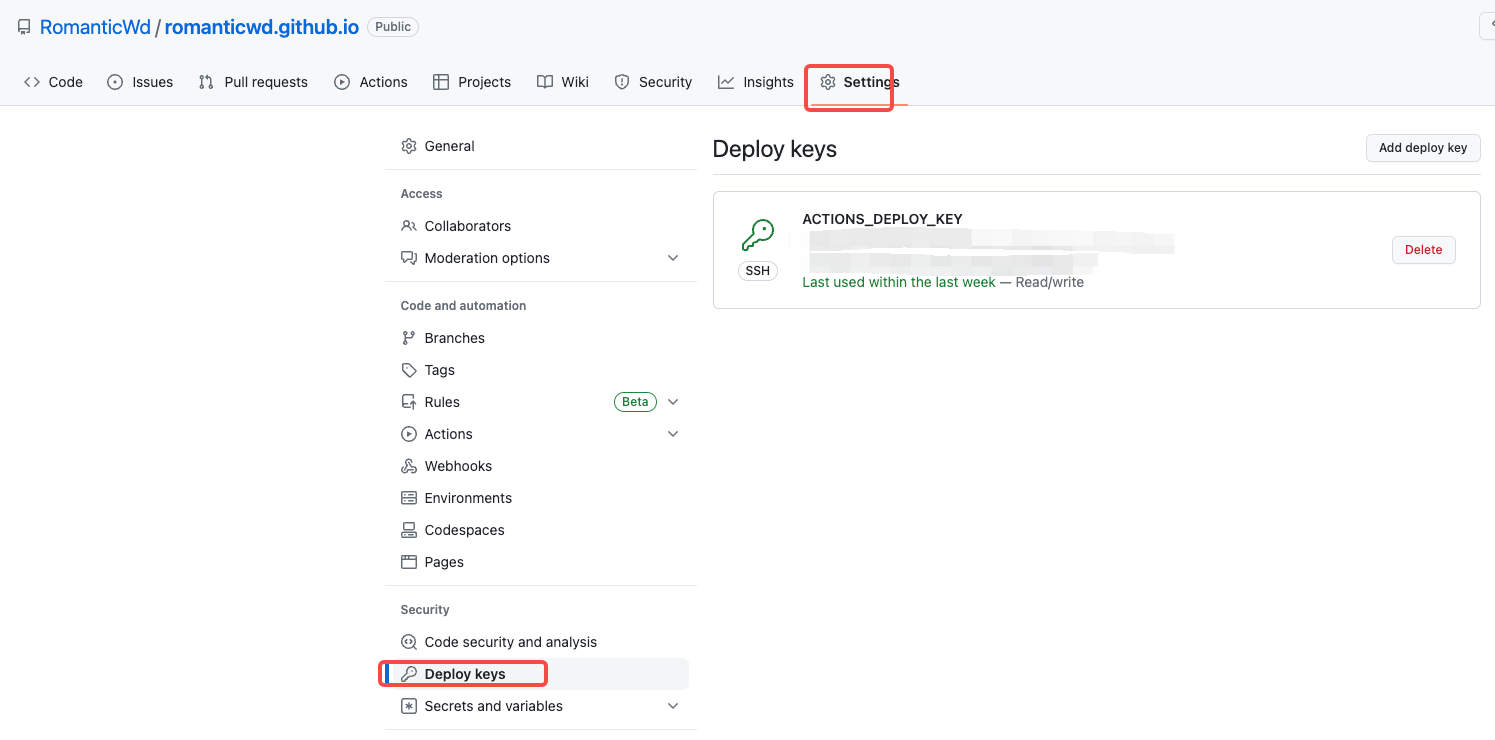
- Deploy keys name写为
ACTIONS_DEPLOY_KEY,value为公钥gh-pages.pub的内容。 - Deploy keys设置
Allow write access
注意这里千万不要搞错了,是公钥gh-pages.pub 的内容。
Actions secrets
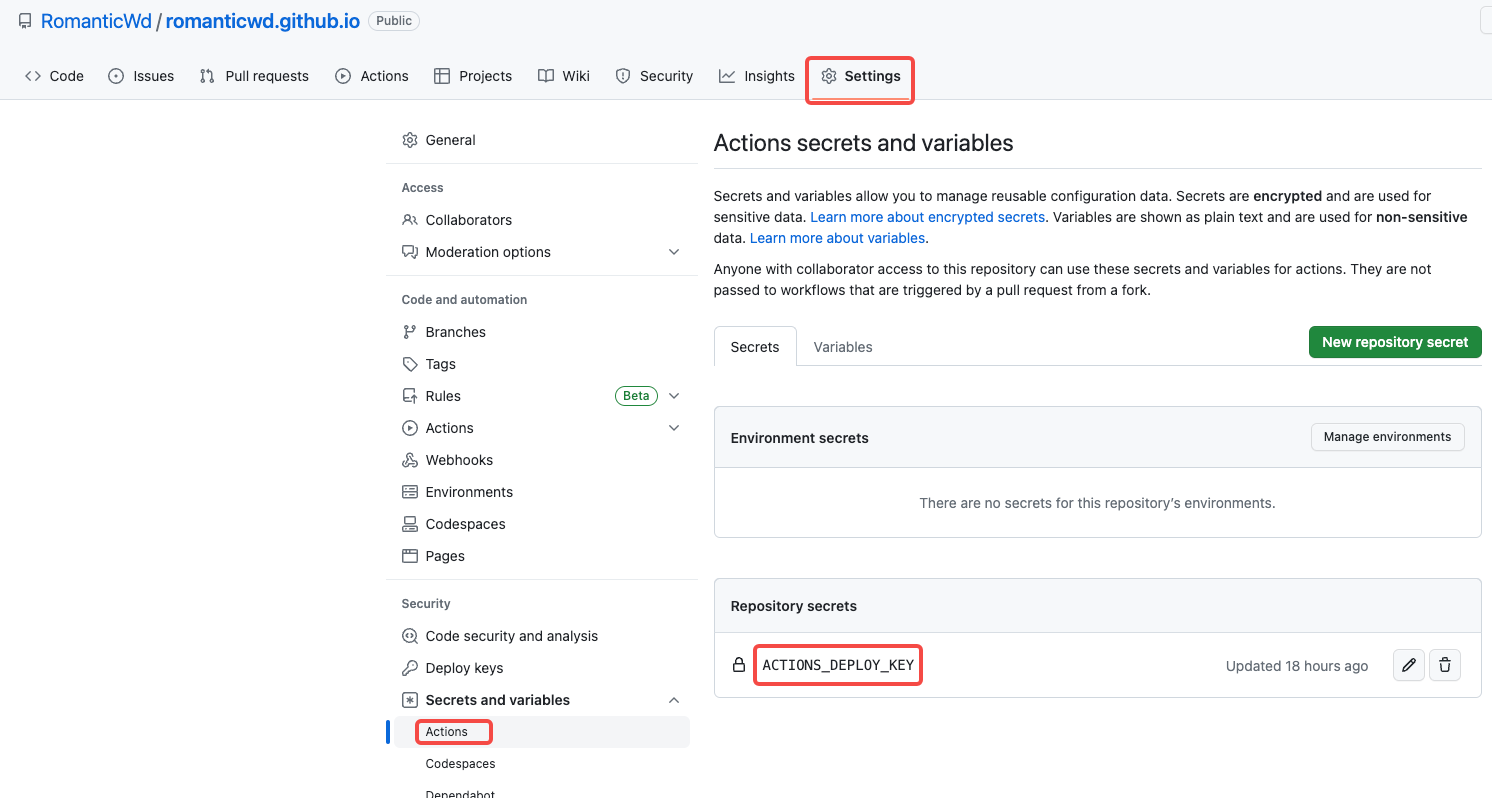
- 将私钥
gh-pages添加为ACTIONS_DEPLOY_KEY(这个名称在yml文件中需要使用)
pages.yml配置
在源码根目录下创建.github/workflows 文件夹,在文件夹下新增pages.yml 文件,文件内容如下:
1 | # 名称随便定义 |
修改 源码中_config.yml** 文件中的Deploy配置**
1 | # Deployment |
在配置中可以看到deploy的分支是gh-pages,这个就是我们静态文件要存放的分支。
最终的分支目录:
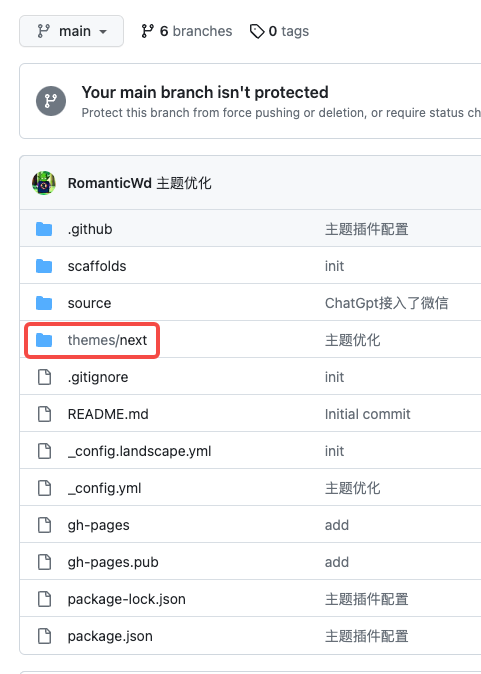
源码分支是main,page.yml文件监听的就是main分支,其中themes文件夹可以不要,那么就需要在page.yml文件中指定需要使用的主题,源码和配置中相同的主题只能存在一个,如果重复的话会报错主题已经存在。
1 | # 安装主题(这里由于还对next主题进行额外设置,就不再每次安装主题了,而是将主题设置提交到源码中) |
我这里使用的next分支,因为需要做一些个性化的配置,所以就将主题文件上传到源码仓库中,这样每次action执行的时候就会使用我的主题配置来生成静态文件。
注意想要上传主题源码的话,需要从暂存区删除该文件夹:
1 | git rm --cache themes/主题文件名 |
并删除主题源码中的.git 文件夹。
3. 静态文件分支配置
这里就很简单了,创建一个gh-pages分支就好。
4. GitHub Page配置
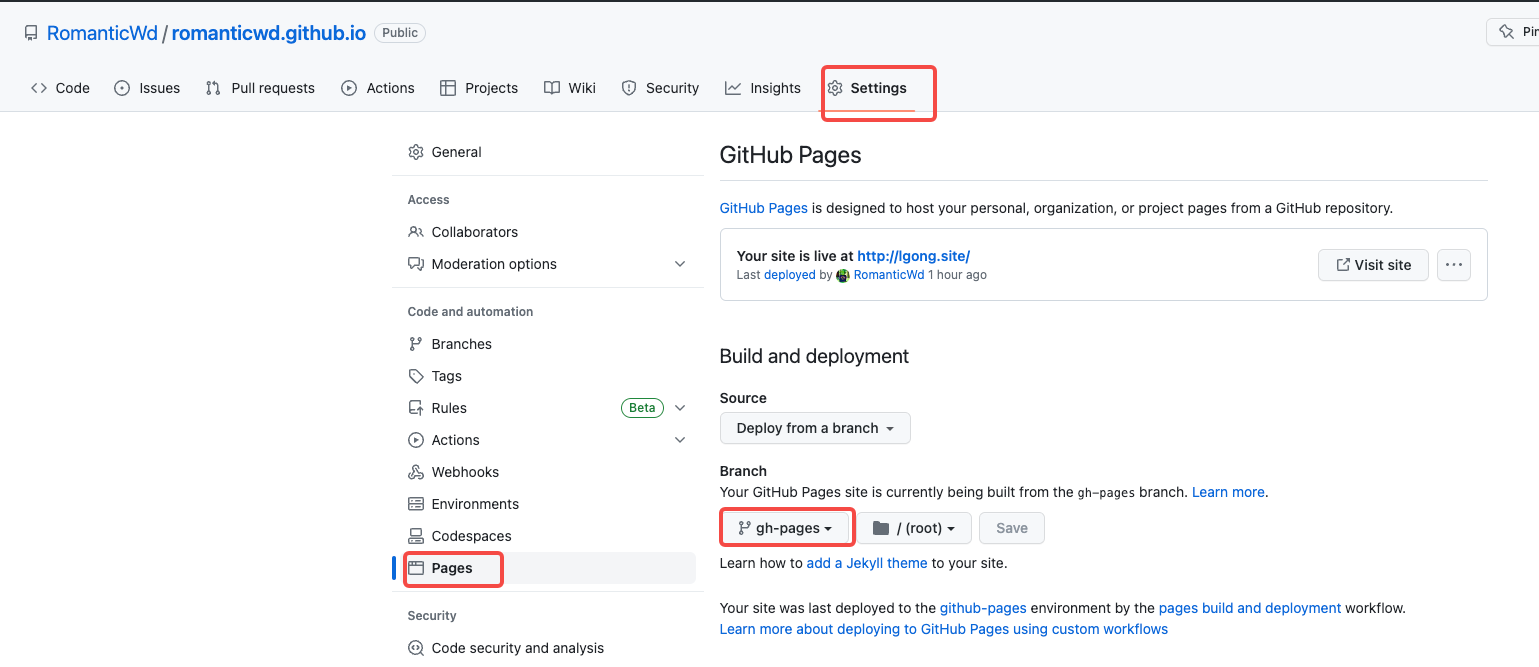
指定分支为存放静态文件的gh-pages分支。
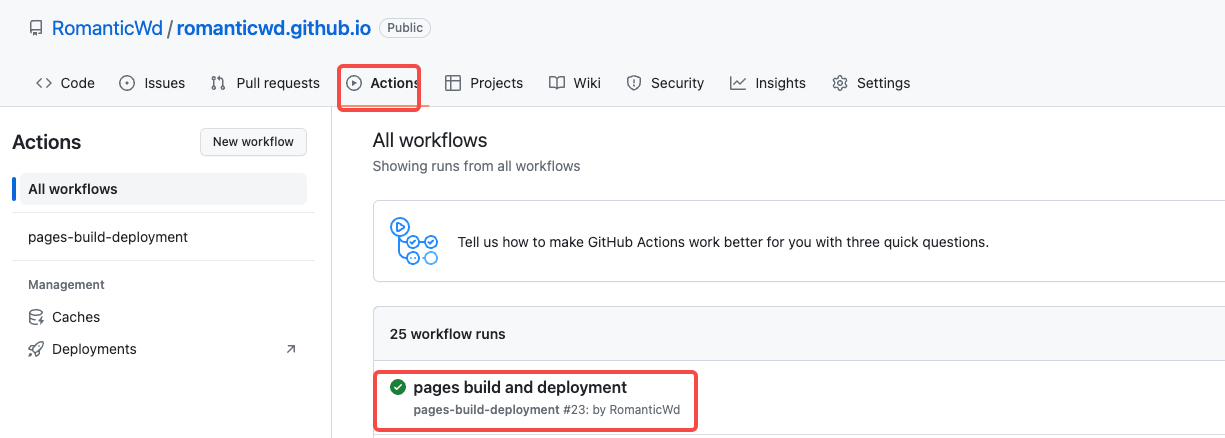
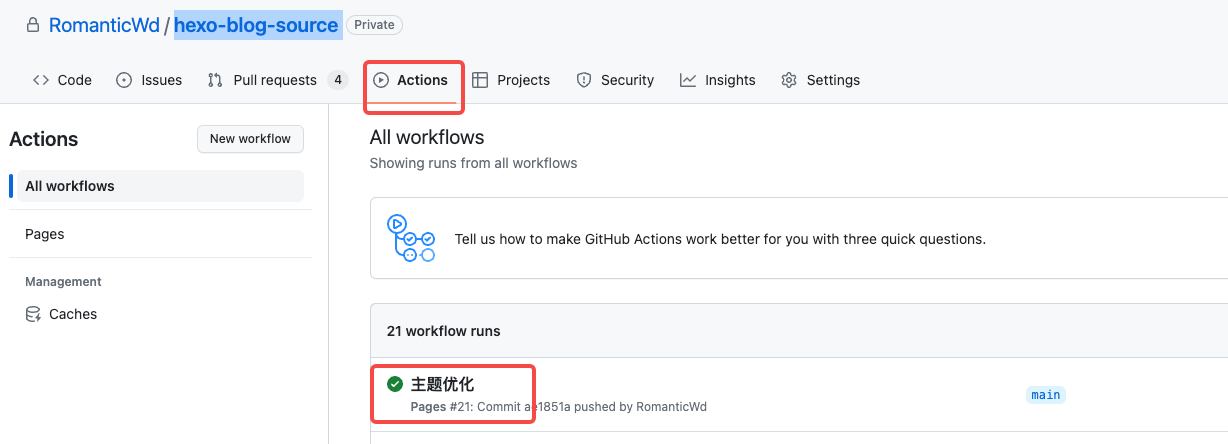
5. 执行效果
推送代码,触发action,可以点击看到具体的执行信息,如果有报错可以看到具体的报错日志。
因为我们GitHub Page指向的仓库必须是public,而我们的博客源码中有很多我们创作的内容,为了考虑隐私性,需要将源码和静态代码分开存放,源码存放在私有仓库中。
所以就有了方案二。
二、源码和静态代码放在同一个仓库中
首先创建一个私有的仓库,这里叫做hexo-blog-source。
1. 生成personal token
访问地址 生成一个 personal token。
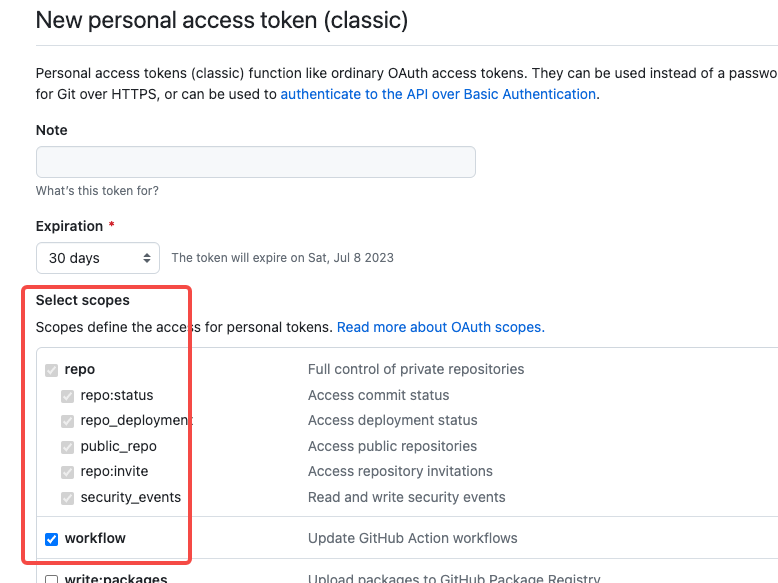
这里的名称可以随便定义,scopes选择repo。
2. 源码仓库配置
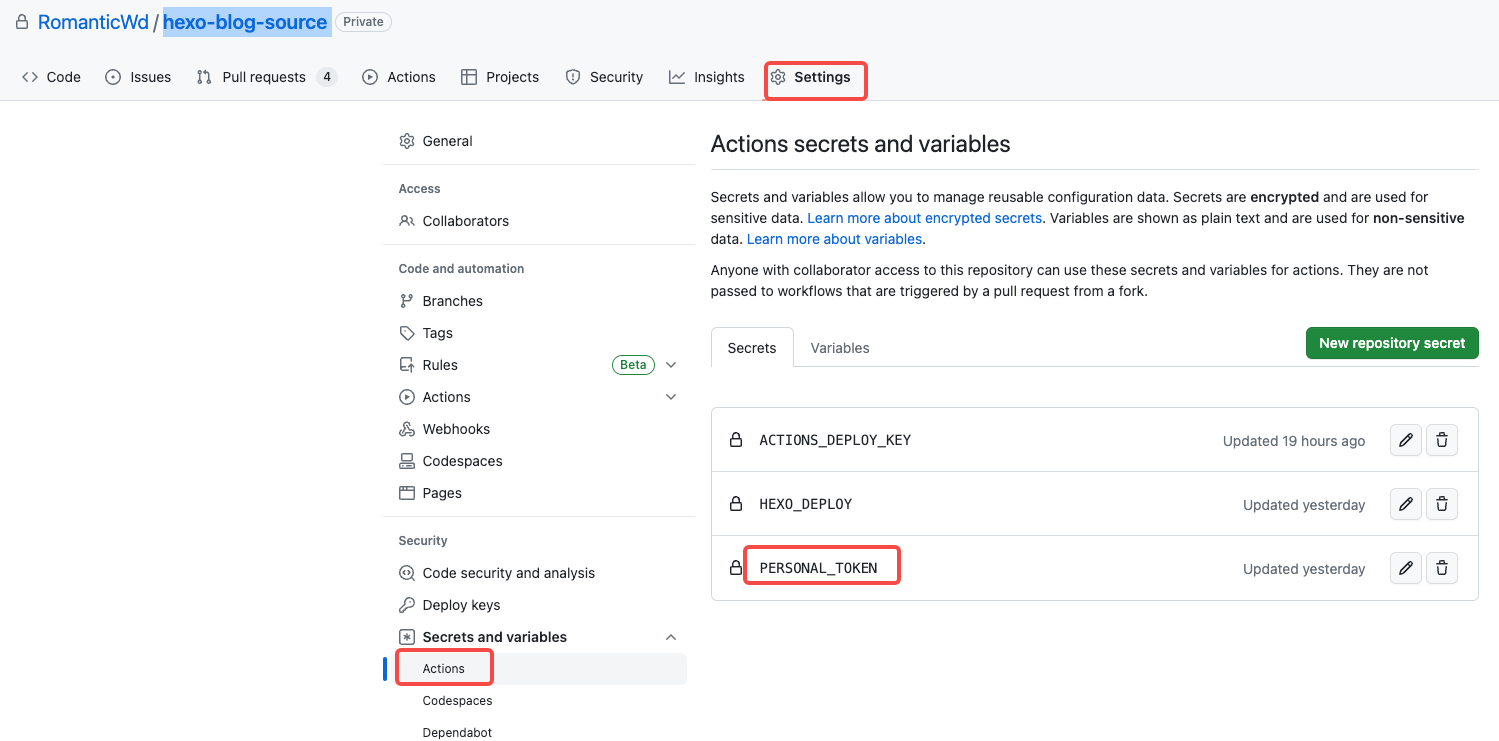
将上一步生成的token添加到私有仓库的 Secrets 里面(点击上方 Settings,然后点击 Secrets),名字为 PERSONAL_TOKEN 。
pages.yml配置
在源码根目录下创建.github/workflows 文件夹,在文件夹下新增pages.yml 文件,文件内容如下:
1 | name: Pages |
注意两个配置:
- personal_token
- external_repository:为要推送的静态代码仓库名。
其他无需改动,源码中_config.yml 文件中的Deploy配置保持原样:
1 | # Deployment |
验证效果:
成功!
遇到的问题
在使用的过程中遇到了很多问题,最终功夫不负有心人,将遇到的问题记录下来,希望可以避免更多人踩坑。

1. action执行报错1:
1 | fatal: 'themes/hexo-theme-landscape' already exists in the index |
这个比较好解决,主题重复了,按文档提到的删除源码中的主题,或者删除page.yml配置中的安装主题。
2. action执行报错2:
1 | remote: Support for password authentication was removed on August 13, 2021. |
比较明显的权限不足,根据源码和静态文件是否在同一个库中,检查ACTIONS_DEPLOY_KEY或PERSONAL_TOKEN。
3. action执行报错3:
1 | Error loading key "/home/runner/.ssh/github": error in libcrypto |
这个问题卡了我很久,ACTIONS_DEPLOY_KEY配置正常,但是就是不知道为什么报错,后来仔细检查发现我两个地方都配成了公钥。
应该一个是公钥,一个私钥。
4. action执行报错4:
1 | Error: Action failed with "The generated GITHUB_TOKEN (github_token) does not support to push to an external repository. |
这里是因为key使用错误,根据需要使用对的key,修改对应的page.yml文件即可。
5. action执行成功,博客页面打开一片空白:
这是因为主题配置错误,检查page.yml、_config.yml、源码目录下theme文件夹下相关的主题配置。